Non Gamstop Casinos UKNon Gamstop Casinos UKCasinos Sin LicenciaCasinos Not On GamstopCasino Sites Not On Gamstop

Monday, October 29, 2012

Rub 'n Buff Shoes

Yeah, I went there. Is there anything in this world that's safe from me slapping it with paint or other appearance-altering substances? Probably not.

This is a great, quick project for Halloween or anytime -- I used an old pair of tie top bridesmaid heels my sister donated to the cause, and I think they'd be amazing for a Cleopatra or goddess costume. And as such I will be keeping them around and perhaps tailoring my 2013 costume to their fabulousness.

You could easily pull out a tired looking pair of strappy heels from your closet and work some magic on your regular wardrobe, too. After all, everyone needs metallic dress sandals. Or so I say. But really, a LBD with gold sandals? Love. So much more interesting than black shoes.

No special instructions here, guys. Just grab some sandals in need of some Rub 'n Buff love...


... and go to town! Caution, if you're like me and you paint/rub 'n buff/handle frozen blueberries first and think later, your fingers will get dirty and you'll have to wash your hands a lot and exfoliate to get it off. Or try this method for removing oil-based paint, which I just found -- anybody know if it actually works??


The Rub 'n Buff goes on really easily, dries quickly, and doesn't come off when you stick your foot in there. Look at me make a pair of new shoes. I'm practically a cobbler.


Get thee to your closet!

Wednesday, October 24, 2012

Sparkly Things 10.24.2012

You guys rock. I don't know what else to say, I got so many comments and notes that made me feel great about my decision to go back to school, and all I can say is that I am touched and blessed to have such amazing readers who are so supportive! Like I said, y'all rock.

This school transition is a bit tricky right now, and I'm working on getting used to my new schedule and the dress code. I can only wear black, white, gray, brown, tan, and cream clothing (accessories and shoes don't count) four out of the five days each week. Um... time to go shopping so I don't wear the same things each week, I think. Or time to get a whole lot more creative. Feel free to send awesome outfit ideas my way. Because frankly, I'm a boring dresser. (There, I said it. Honesty is the best policy.) 

These lace peplum tops caught my eye, though:


The Dolce Vita one above makes my heart flutter, but it's $187. This one below, from Casual Couture by Green Envelope is considerably less expensive on bluefly.com and still cute. Not as cute, but still cute.


And I need some fiercely fabulous teal earrings, especially now that I'm a redhead imposter.


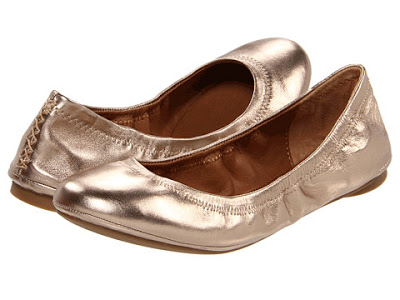
And while I'm at it I think I might need some new metallic ballet flats.
Why stop now? I'm absolutely in love with these boot socks from Grace and Lace:


I'm also using this new routine as an opportunity to increase my water consumption -- I'd rather not drain a Diet Coke every night while I sit in class, and I might as well hydrate if I am going to esthetics school, right? I tried this apple cinnamon water 'recipe' I found through Pinterest, and I've got to say... love it! The cinnamon flavor really comes through, and I'm going through pitchers of this stuff like it's, well... Diet Coke ;)


On a slightly sad note, I can't sit and eat an entire batch of these pumpkin scones, even though that's really all I want to do after coming home from class at 10:30 each night:


All because I was warned that there is a lot of nakedness in the esthetics department while we practice techniques. Lord, give me strength to get spray tanned and waxed! I need to start doing lunges.

Good news though, while I was on my treadmill this morning getting my 4 miles in, I was staring at my ugliest-ever bookcase and inspiration hit for an easy upgrade to one of my rarely used, never blogged basement rooms. It could be a great idea, or it could have just been a lack of oxygen...only time will tell. Let's get through this first week in one piece. Baby steps.

Thanks for being patient while I find my rhythm with this new schedule! XO

Sunday, October 21, 2012

A New Adventure

Today is an exciting day in my world, and I wanted to share!

First, I haven't talked about my personal life a lot online because I just assumed y'all were here for the blog and its regular topics. I've worried that sharing too much would turn people off (I must think I'm boring!). Recently, however, I made the decision to try and share a little more. In my "real life" I'm pretty introverted until I get to know people and am truly comfortable, and I've discovered that this truth holds online.

So, here goes: I'm going (back) to school. 

When Mike and I found out we were going to have our first son I was in school at the University of Utah (go Utes!) preparing to start nursing school. It was a surprise and it changed everything. My mom quoted a John Lennon lyric and told me, "life is what happens to you while you're busy making other plans." Isn't that the truth? I am such a planner and very rarely does something actually work out the way I think it will.

(Mike and I in simpler, blonder (for me) pre-baby days)

We talked about it and I decided to leave school. Paying for full-time childcare for an infant while I went to school more than full-time with clinicals, without the added income of even a part-time job just wasn't in the cards for us -- plus I desperately wanted to be home with my child. It was a tough decision and I wish it could have have worked out timing wise, but I've never regretted leaving school and my family is the best thing that's ever happened to me.

Fast forward. Within the last year or two I really started thinking about going back to school... I wanted to have something, even if I only did it part-time, and especially so that if I ever had to take care of my children on my own for whatever reason, I would be equipped with some sort of defined skill that would enable me to find a job and provide for them.  I know I have some design, web, and marketing skills, but employers don't; I have no degree nor do I have relevant job experience outside of this blog, which a lot of people still don't take as seriously as they should -- so finding a job could be tricky.

I decided against returning to nursing because of the program length, costs and time commitment as my kids are still young, and also because my area is pretty saturated. In the end, I decided to go to school to become an esthetician! I've always loved skin and I'll still get to interact with and help people. And think of the money I'll save by being able to wax my own legs! That was my argument to Mike for the class.

(note to self, I think it's time for a new family photo too...)

Class starts Monday and the program runs for about 6 months in the evenings -- I'll be in class Monday-Friday, 5-10 pm. I get a little nauseous thinking about that part, so I focus on how short 6 months really is in the grand scheme of things and how my friends and family will all love me when I'm giving them chemical peels.

Never fear, I will not stop blogging, nor will I stop working on my house. I think if I stopped knocking holes in things or changing paint colors I might suffer a psychotic break. My house is my hobby and I love it. I just wanted to share this new chapter in my life with you so you know what's going on in my life and so you understood why if I spend the next 6 months finishing and improving things instead of knocking new holes in walls, you'll understand!

Wednesday, October 17, 2012

Your Tile Job's Not Over 'Til it's Over

Today, I ignored the fact that my basement flooded yesterday during a massive rainstorm we had. I ignored the gallons of water I vacuumed up so that it would dry, and I certainly ignored the few things we had in our storage room in cardboard boxes that may or may not survive (argh! Friends, use plastic totes to store things!)

Today, the only thing I wanted to worry about was finishing the tile job. The tile is down and grouted, but there are just a couple last details to worry about before I can put a check in that box and move on: sealing the grout and using tile caulk. Ohh, details... those little things at the end that are so easy to forget.


Lucky for us these last little details are simple and quick. Like I mentioned in a previous post, sealing your grout is an important step to help protect against stains because it's a porous material that will soak up whatever you put down on top of it. The tile we used in the entry is porcelain and therefore doesn't need to be sealed, but make sure you find a special stone/grout sealer if you use natural stone for a project (like I did in my $53 backsplash).

I went with the stuff with a brush applicator because the guy in the store said that while it takes a little longer than the spray stuff to apply, it lasts longer too. It was a nice small size perfect for a nice small job,  but it does come in larger quantities, and there are also more expensive brands that supposedly last longer too. You should plan on sealing your grout every year or two to keep it stain-free.

It's very easy to apply -- just squeeze it out along the grout line in as even a fashion as possible, let absorb for a few, go back over for a second coat, and then carefully wipe up any sealer that has gotten on the tile surface as it will leave a haze once dry that's very difficult to remove.

After that was dry I whipped out the tile caulk. You can find tile caulk right next to the grout and it even comes in matching colors -- you can see in the photo at the top that I used 'Haystack' grout and caulk for my entry. Try not to get too depressed when you buy a tube of caulk that costs $7, knowing that you only need a 48-inch line. Or you know, get depressed, and then help yourself feel better by buying a rug or a light fixture. You're already there, and I'm a proponent of retail therapy.

You should apply tile caulk where vertical or horizontal surfaces meet -- in this case, where my wood floors meet my tile floors. It flexes more than grout but still looks similar to it so you doesn't ruin the overall aesthetic by having a giant white latex caulk line down your floor. Sometimes $7 bottles of caulk are worth it, y'all. 
 And with that, my tile floor is actually done.  Now to move onto more pressing issues in the space, like... well, everything.

Tuesday, October 16, 2012

Getting in the Halloween Spirit


Two weeks before Halloween, I finally did a little decorating. (Emphasis on little.) I've been a bit preoccupied lately with some things in my personal life and I just haven't had the desire or energy to decorate, but yesterday I pulled out a couple boxes and put some decorations around for my boys. And I'm happy now that it's up, even if it took a whole bunch of "I think I can, I think I can..." to get in gear. Maybe now I can have a little Halloween fun!


Friday, October 12, 2012

How to Fix a Stripped Screw Hole with Toothpicks

I'm using this bigger kitchen project as an excuse to focus on some of the smaller details in the room too. First up, stripped screw holes in the wood -- I had some in both the cabinet box and a door, thanks to kiddos who liked to hang on cabinet doors when I wasn't watching.

 
If you've had them you know how annoying they are (stripped screw holes, not kids). If those screws fall out your doors won't close right and who wants to have a cabinet door hanging at a weird angle?


Luckily, it's a very quick and easy fix. Break some toothpicks in half and dip the pointy end of a couple into wood glue, then insert them into the stripped hole. Tap them in with a hammer, and then start adding more toothpick halves, always pointy end first, tapping them in gently with a hammer until you absolutely can't fit anymore in:


Let it dry, and then enter use a hammer and a sharp chisel to cut the exposed toothpicks ends off, or snap them off one by one and use a chisel just to break off any little bits that remain so the toothpicks are as close to flush with the surface as possible:


Now you've got screw holes that are packed solid with wood and wood glue!


Then it's as easy as screwing back into them...


And easy peasy, your problem is solved.


That was easy. I'm sort of embarrassed to admit that I lived with weird hangy cabinet doors for months and months.

Thursday, October 11, 2012

Visions of Breakfast Bars

Besides opening the kitchen up to the dining and living rooms, my main reason for knocking some holes in my walls was to try and create a useable breakfast bar area. I would love to be able to serve my two boys their snacks or lunches right near where I'm working, and I'm sure my older son will choose to do his homework there sometimes too, since he often asks me to sit with him and keep him company. And I can't wait for Mike to be able to sit, drink a glass of wine and chat with me while I cook dinner. (Or even better, the other way around!)


The problem is that since we are limiting the cost by making the best of what we have for the time being, the dimensions aren't ideal. We'll only be able to fit two stools -- they'll be tucked in there pretty snugly, and they're going to need to have a smaller footprint to make it possible. In addition, the top of the notched out wall where this is all happening is 46" high which is too high for a standard counter-height or bar-height stool and we can't make it lower (like just extending the current counter) because I don't want to buy new countertops. So we're working within some pretty rigid constraints.

Here are the options that I'm considering:

Option 1: Finishing the bottom of the notch in the wall with a wider board to create a breakfast bar and buying two adjustable stools that can reach the crazy tall height that is required.  The only place I've found such inventions for less than $200 each is at a school supply website I first saw at Young House Love -- and they don't look like much to begin with, but when Sherry & John painted theirs aqua they were darling, so I'm not worried. They are also really inexpensive which is a big plus for this spur-of-the-moment project.


PROS: Takes up less of the walkway toward the living room, clean line with only one "counter" surface.
CONS: Extra tall stools might be difficult for kids to scale, less choice in bar stools, and I wonder if it would look out of proportion or odd because it's not a commonly used height?

Option 2: Finishing the bottom of the notch in the wall with a thin board that matches the one behind the sink and adding a wider board below to serve as a breakfast bar, then buying two regular 30" bar-height stools. 

(Stand-in corbels only for representation, not sure I love them at all)

PROS: More choice in stool style, easier climb for kids
CONS: Takes up more of the walkway into the living room especially if we make the lower counter surface deep enough to be functional, corbels might infringe on the horizontal space needed for the stools since it's already such a tight fit, and I think it might look like too much is going on -- not sure I like the overall aesthetic.

Both options have some drawbacks -- and while I'd most likely be limited to choosing one of the school outfitter's stools (barring an barstool miracle), I do think they'd look cute once painted and I am leaning toward that overall look more than the one with the two levels. I'm just worried about my kids having to take up mountain climbing in order to sit down for breakfast... what do you think? 

UPDATED TO ADD: Several people have suggested taking the new breakfast bar height down a little lower or to counter height -- unfortunately we're stuck with the height it is at currently (you can see in the photo below that it is cut down to right above the backsplash) or we would have to remove the whole section of backsplash, and then it would be flush with the counter. The problem with the lower height option is you then have a weird seam in your counter -- laminate to the left, new material to the right.  I'm not sure I would like that look at all -- any ideas? Also, replacing the countertops isn't an option now because we would then have to replace the backsplash as well since it sits on the counters, and I don't want to drop that kind of money (even for inexpensive options) into a kitchen I'd like to tear up in a few years.


UPDATED TO ADD AGAIN (ohmygoodness): I just got off the phone with my "incredibly attractive, single contractor friend" (his requested words) and he said that we could remove the top row of tiles on the pony wall without disturbing the rest of the backsplash. So if we dropped that wall down one row it would take the new breakfast bar height to about 42-43" which is a teensy bit tall for 30" stools but it may just work. So that might be the winning solution!

Wednesday, October 10, 2012

The Story Behind My Kitchen's Missing Walls

You may have noticed I've got a couple new holes in my kitchen walls. Let me explain.

Picture it: my house, hopefully sometime before 2050 -- a remodel that involves removing the useless miniature wall between my living room and dining room, removing walls completely to open the kitchen up and extending it by adding a peninsula. It'll be great; I know this because I've diagrammed it and you can totally see the epic potential.


The other day though, when I was supposed to be spending time and energy on my tile entry, I was talking my contractor friend Joe the Builder into tearing up my kitchen wall. My husband (who was aware of the plan, in my defense) was alerted to this decision by a picture message while he was in business meetings. This project spontaneity is how I keep our marriage fresh, or how I keep him on his toes, or maybe just how I maintain my motivation to keep running faster and farther than he can.

The good news? It took Mike all of two minutes after arriving home to decide that I was the smartest, prettiest, most fabulous kitchen wall removal mastermind he knew. Phew. It's an amazing change, and even with all the unfinished sheetrock and exposed wall innards, it is already better. I promise. Love it. I can interact with my family while I cook which makes all the difference in the world.


The changes being made now will end up being a great compromise to open the kitchen up to the surrounding rooms without having to make the larger structural changes that I have planned for the future. We left a little header on the walls so there won't be any ceiling patching needed between rooms, and we only took a notch out of the small wall between the kitchen and the dining room which helped us avoid patching the entire cabinet end area -- flooring, cabinet box, counters and backsplash.


Would I love it even more open in the future, with a real peninsula? Sure! But this is so much better than what we had so it's a perfect compromise until we can budget for a new kitchen -- and I'm much more at peace with the idea of waiting a while now.

 
The wall behind the sink was a single long cabinet box, so that came off in one piece and left the larger opening with an interior window frame that we also removed, and an incomplete side on the neighboring cabinet box.

 
I did lose some storage space, but some simple rearranging and moving lesser used dishes (china, canning jars, etc.) to shelves in the basement fixed that problem. Truthfully I wasn't effectively using what cabinet space I did have, so rather than feeling cramped I just feel like I'm carefully making the most of the space.


To finish this new kitchen project, here is what's on the to do list:
  • Hire someone to patch the drywall revealed by the cabinet box removal and match the kitchen's existing texture.
  • Paint the walls to match.
  • Painting all remnants of knotty pine. Orange, be gone!
  • Trim the headers
  • Build a faux column around the corner post that needs to remain for structural reasons.
  • Patch the side of the cabinet box that butted up against the glass-doored cabinets we removed.
  • Figure out how to best convert the notched wall opening between the kitchen/dining rooms into a small breakfast bar area (more coming on that this week!)

Monday, October 8, 2012

Tile and Grout, Check!

Even with my short attention span and impulse wall removal plans (seriously, who does that?) the entry tile still went in over the weekend and last night was grout night.
 
All that remains now is to caulk the 4-foot line between the new tile and the wood floor and to seal the grout. The tile we used is porcelain so it doesn't need to be sealed, but unsealed grout can let in moisture and stains so it's a good idea to plan on sealing it soon after a tile installation.


The tile we chose is Marazzi's Montagna porcelain tile in 'Cortina' which I found at Home Depot. It's similar looking to Travertine and I'm really pleased with it so far.

Even though the website doesn't show the 12x24 size it was in stock at my local store for about $2.28 a square foot.

I think the flooring looks great now -- which brings my entry's score to 1 out of 50 or so. Squint, and try to imagine the door a different color, and some trim, and some board and batten, and oh... I don't know, some decor?


It'll be great! Eventually. At least we're taking steps toward that, right?

Friday, October 5, 2012

Entryway Progress and a Surprise

Today was the day, the day when our fabulous contractor friend "Joe the Builder" (his name choice) came back into town and was set to help us with our tile entry. He volunteered to help because it's an old floor with a giant hump in it and it needed an experienced hand to build up the thinset in the right places and make it as level as possible, a feat made more challenging by the 12x24" tiles I chose. Iam an expert at being high maintenance.

So this morning Joe came over and I was excited and ready to go, but before we got started I wanted to run a quick idea for my kitchen by his professional ear. A lot of you know that I would love to gut my kitchen and open it up to the rest of the house. Unfortunately, that's not in the cards right now...  but a way to inexpensively make the most of it for the time being had recently occurred to me. Joe thought it was a doable project, we talked costs and it seemed inexpensive and a great thing to consider.

I admit, we got sidetracked for a while. But now it's evening and the tile is going in...


But back to getting sidetracked. We got sidetracked about this much:


Anybody in the mood for a kitchen project?

Thursday, October 4, 2012

Color Pop with Pillows

Yesterday I took a few minutes to sew a couple new pillow covers for my living room sofa.


Oh, my living room. My perpetual work-in-progress, never-gonna-be-done space that I'm never fully happy with. Maybe one day. My aqua lamps need to be a different color, and I'd like another chair and while we're on the subject that mini wall needs to come down so I can do some rearranging.


I knew I wanted to add a deeper, more saturated color to offset all the aqua and help ground the space. I thought a rich teal would do the job nicely, and I found a faux velvet type fabric that added some warm texture as well. When I was at the store I also stumbled across a burst design fabric in aqua, gray and citron -- which helps pull my lemongrass chair in a bit more. Finding it was a happy accident.


I'm always on the lookout for fabrics or pillows that I like... random assortments appeal to me more than perfectly matched sets. I make most of my design decisions as I go along, and I'm good with that -- if it feels okay, then I say it's okay.


Wednesday, October 3, 2012

It's In The Details: Painted Pianos

I feel like this could be a dangerous topic if anyone feels passionately about pianos, but it's been on my mind for a while and I thought it was worth discussing; not because I'm going to paint my piano, which I grew up with (so please stop hyperventilating, Mom!) but because a lot of people go this route and it's intriguing to me!
I'm not afraid of painting wood in general (unlike 85% of all males I know) but I also don't have anything against stained finishes. As in, I don't walk around singing, "I see some stained wood and I want to paint it black!" (do you see what I did there? I'm so classic rock.)

Something about painting a piano just gives me the jitters; apparently it's not supposed to really affect the sound quality if done very carefully, but I can't completely wrap my head around that. I think it's that I view a piano as an instrument first and a piece of furniture second -- and the musician in me just says no.

Having said all that, I think it's a good idea for people with basic pianos that aren't great quality or family heirlooms, if you're comfortable having a focal piece the size of a Mini Cooper in your living room... because once you paint that sucker blue, or red, or yellow, you'll have to decorate around it and it's the first thing people will notice when they visit!

Check out a few more striking examples:


What do you think? Is painting a piano something that would work in your home? If you've already done this, do you love it or regret the decision?

My only advice would be to go slow, and be careful not to get paint on any of the inside parts like hammers!

{Photos: 1. Pennington Point; 2. Bake at 350; 3. Centsational Girl; 
4. Design Mom; 5. Sweet Pickins}
Related Posts Plugin for WordPress, Blogger...